Python Autopsy Module Tutorial #3: The Report Module
It’s time for the final Python tutorial in this series and just in time to give you a chance to write something for the OSDFCon Autopsy Module Competition. In our last two blog posts, we built Python Autopsy file ingest modules that analyzed the data sources as they were added to cases. In our third post, we’re going to make an entirely different kind of module, a report module.
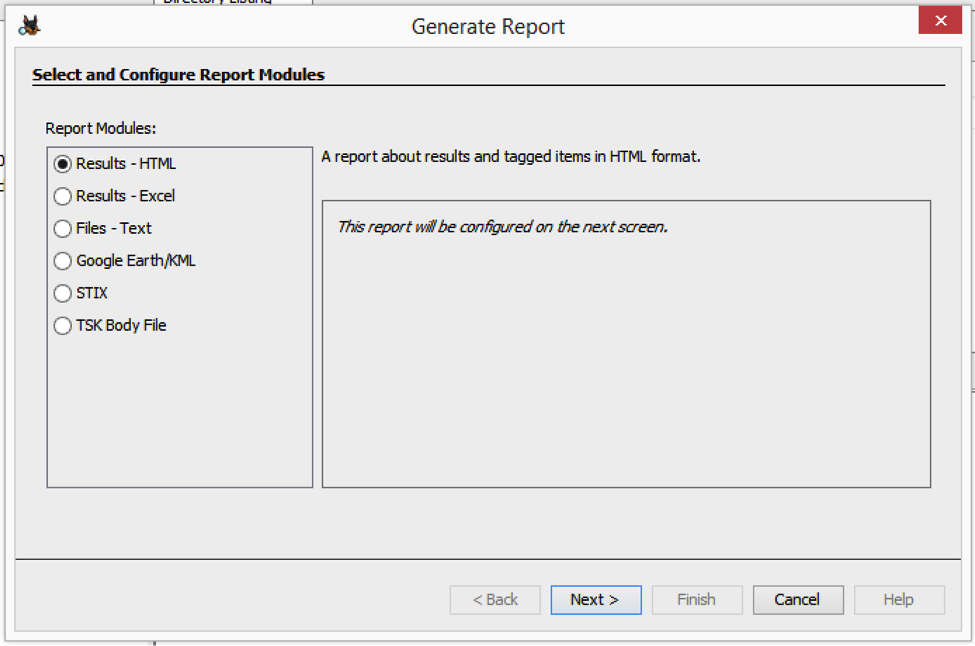
Report modules are typically run after the user has completed their analysis. Autopsy comes with report modules to generate HTML, Excel, KML, and other types of reports. We’re going to make a report module that outputs data in CSV.
Like in the past blog post, we are going to assume that you’ve read at least the first post to know how to get your environment set up. As a reminder, Python modules in Autopsy are written in Jython and have access to all of the Java classes (which is why we have links to Java documentation below).
Report Modules
Autopsy report modules are often run after the user has run some ingest modules, reviewed the results, and tagged some files of interest. The user will be given a list of report modules to choose from.
The main reasons for writing an Autopsy report module are if:
- You need the results in a custom output format, such as XML or JSON.
- You want to upload results to a central location.
- You want to perform additional analysis after all ingest modules have run. While the modules have the word “report” in them, there is no actual requirement that they produce a report or export data. The module can simply perform data analysis and post artifacts to the blackboard like ingest modules do.
As we dive into the details, you will notice that the report module API is fairly generic. This is because reports are created at a case level, not a data source level. So, when a user chooses to run a report module, all Autopsy does is tell it to run and gives it a path to a directory to store its results in. The report module can store whatever it wants in the directory.
Note that if you look at the full developer docs, there are other report module types that are supported in Java. These are not supported though in Python.
Getting Content
With report modules, it is up to you to find the content that you want to include in your report or analysis. Generally, you will want to access some or all of the files, tagged files, or blackboard artifacts. As you may recall from the previous tutorials, blackboard artifacts are how ingest modules in Autopsy store their results so that they can be shown in the UI, used by other modules, and included in the final report. In this tutorial, we will introduce the SleuthkitCase class, which we generally don’t introduce to module writers because it has lots of methods, many of which are low-level, and there are other classes, such as FileManager, that are more focused and easier to use.
Getting Files
You have three choices for getting files to report on. You can use the FileManager, which we used in the last Data Source-level Ingest Module tutorial. The only change is that you will need to call it multiple times, one for each data source in the case. You will have code that looks something like this:
    dataSources = Case.getCurrentCase().getDataSources()

    fileManager = Case.getCurrentCase().getServices().getFileManager()

    for dataSource in dataSources:

        files = fileManager.findFiles(dataSource, “%.txt”)
Another approach is to use the SleuthkitCase.findAllFilesWhere() method that allows you to specify a SQL query. To use this method, you must know the schema of the database (which makes this a bit more challenging, but more powerful). The schema is defined on the wiki.
Usually, you just need to focus on the tsk_files table. You may run into memory problems and you can also use SleuthkitCase.findAllFileIdsWhere() to get just the IDs and then call SleuthkitCase.getAbstractFileById() to get files as needed.
A third approach is to call Case.getDataSources(), and then recursively call getChildren() on each Content object. This will traverse all of the folders and files in the case. This is the most memory efficient, but also more complex to code.
Getting Blackboard Artifacts
The blackboard is where modules store their analysis results. If you want to include them in your report, then there are several methods that you could use. If you want all artifacts of a given type, then you can use SleuthkitCase.getBlackboardArtifacts(). There are many variations of this method that take different arguments. Look at them to find the one that is most convenient for you.
Getting Tagged Files or Artifacts
If you want to find files or artifacts that are tagged, then you can use the TagsManager. It has methods to get all tags of a given name, such as TagsManager.getContentTagsByTagName().
Getting Started
Making The Folder
We’ll start by making our module folder. As we learned in Part 1, every Python module in Autopsy gets its own folder. To find out where you should put your Python module, launch Autopsy and choose the Tools -> Python Plugins menu item. That will open a subfolder in your AppData folder, such as “C:UsersJDoeAppDataRoamingAutopsypython_modules”.
Make a folder inside of there to store your module. Call it “DemoScript3”. Copy the reportmodule.py sample file into the this new folder and rename it to CSVReport.py.
Writing the Script
We are going to write a script that makes some basic CSV output: file name and MD5 hash. Open the CSVReport.py file in your favorite Python text editor. The sample Autopsy Python modules all have TODO entries in them to let you know what you should change. The below steps jump from one TODO to the next.
- Factory Class Name: The first thing to do is rename the sample class name from “SampleGeneralReportModule” to “CSVReportModule”. In the sample module, there are several uses of this class name, so you should search and replace for these strings.
- Name and Description: The next TODO entries are for names and descriptions. These are shown to users. For this example, we’ll name it “CSV Hash Report Module”. The description can be anything you want. Note that Autopsy requires that modules have unique names, so don’t make it too generic.
- Relative File Path: The next step is to specify the filename that your module is going to use for the report. Autopsy will later provide you with a folder name to save your report in. If you have multiple file names, then pick the main one. This path will be shown to the user after the report has been generated so that they can open it. For this example, we’ll call it “hashes.csv” in the getRelativeFilePath() method.
- generateReport() Method: This method is what is called when the user wants to run the module. It gets passed in the base directory to store the results in and a progress bar. It is responsible for making the report and calling Case.addReport() so that it will be shown in the tree. We’ll cover the details of this method in a later section.
The generateReport() method
The generateReport() method is where the work is done. The baseReportDir argument is a string for the base directory to store results in. The progressBar argument is a ReportProgressPanel class that shows the user progress while making long reports and to make the progress bar red if an error occurs.
We’ll use one of the basic ideas from the sample, so you can copy and paste from that as you see fit to make this method. Our general approach is going to be this:
- Open the CSV file.
- Query for all files.
- Cycle through each of the files and print a line of text.
- Add the report to the Case database.
To focus on the essential code, we’ll skip the progress bar details. However, the final solution that we’ll link to at the end contains the progress bar code.
To open the report file in the right folder, we’ll need a line such as this:
        fileName = os.path.join(baseReportDir, self.getRelativeFilePath())

        report = open(fileName, 'w')
Next we need to query for the files. In our case, we want all of the files, but can skip the directories. We’ll use lines such as this to get the current case and then call the SleuthkitCase.findAllFilesWhere() method.
        sleuthkitCase = Case.getCurrentCase().getSleuthkitCase()

        files = sleuthkitCase.findAllFilesWhere("NOT meta_type = " +

            str(TskData.TSK_FS_META_TYPE_ENUM.TSK_FS_META_TYPE_DIR.getValue()))
Now, we want to print a line for each file. To do this, you’ll need something like:
    for file in files:

        md5 = file.getMd5Hash()

        if md5 is None:

            md5 = ""

        report.write(file.getParentPath() + file.getName() + "," + md5 + "n")
Note that the file will only have an MD5 value if the Hash Lookup ingest module was run on the data source.
Lastly, we want to add the report to the case database so that the user can later find it from the tree and we want to report that we completed successfully.
    Case.getCurrentCase().addReport(fileName, self.moduleName, "Hashes CSV")

    progressBar.complete(ReportStatus.COMPLETE)
That’s it. The final code can be found on github.
Conclusions
In this tutorial, we made a basic report module that creates a custom CSV file. The most challenging part of writing a report module is knowing how to get all of the data that you need. Hopefully, the “Getting Content” section above covered what you need, but if not, then send an e-mail to the sleuthkit-developers list or the Sleuthkit forum and we’ll try to point you in the right direction.
Want to learn more about Autopsy and/or enter our module writing competition? Be sure to come to OSDFCon, our premier event, where we’ll be offering a Python-focused talk and a half-day developer workshop in the DC area in late October.